적
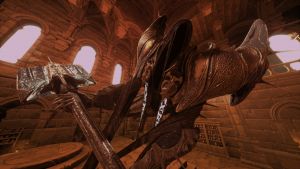
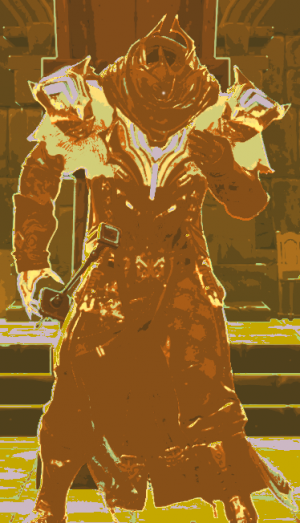
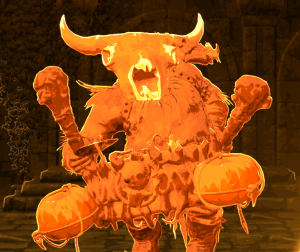
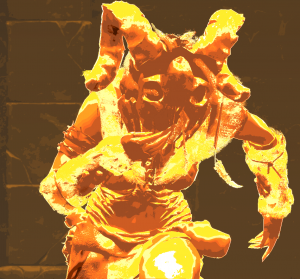
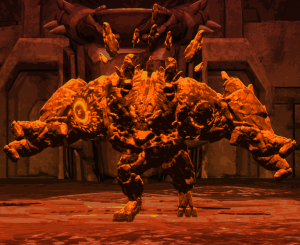
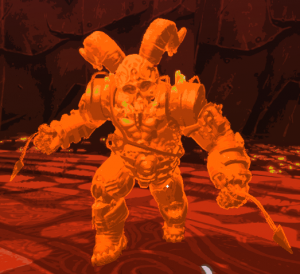
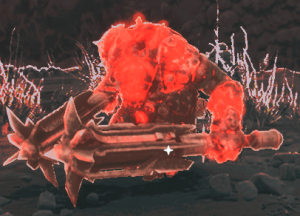
적들은 방 안에서 레벨을 돌아다닙니다. 모든 적을 죽여야 방을 나갈 수 있습니다. 적들은 박자에 맞춰 공격합니다.
Contents
일반 적
적들의 체력은 적들마다 비교해서 측정했습니다: 예를 들어 아기 박쥐는 권총 1발이 필요하므로 체력은 1, 애벌레는 2발이 필요하므로 체력은 2가 됩니다.
무기 페이지에 가보시면 각 무기들의 데미지를 확인하실 수 있스니다. 기본 권총은 1 데미지를 줍니다.
| 사진 | 이름 | 체력 | 공격력 | 설명 |
|---|---|---|---|---|
 |
Worm / 애벌레 | 2 HP |
|
|
 |
Maggot / 구더기 | 1 HP |
|
죽으면 4-6마리의 파리를 스폰합니다. |
 |
Spider Hatchling / 거미 유충 | 1 HP |
|
|
 |
Spider / 거미 | 4 HP |
|
배가 약점입니다. |
 |
Giant Spider / 거대 거미 | 6 HP |
|
등에 달린 노란색 보석 부분이 약점입니다. |
 |
Hexapod / 육각류 | 4 HP |
|
|
 |
Hexapod Portal / 육각류 포탈 | 4 HP |
|
포탈이 부셔지거나 전부 스폰할 때까지 육각류를 스폰합니다. |
 |
Fly / 파리 | 4 HP |
|
날아다닙니다. 슬롯 머신에서 스폰될 수 있습니다. 밝게 빛나는 눈 (약점)을 맞추면 한 방에 죽습니다. |
| Fast Fly / 빠른 파리 | 1 HP |
|
날아다닙니다. | |
 |
Mother of Flies / 엄마 파리 | 5 HP |
|
날아다니면서 죽으면 4마리의 빠른 파리를 소환합니다. |
 |
Hive / 벌레집 | 2 HP |
|
없앨때까지 파리를 소환합니다. |
 |
Baby Bat / 아기 박쥐 | 1 HP |
|
|
| Big Bat / 거대 박쥐 | 15-18 HP |
|
미니 보스로 나오며 체력은 매번 다릅니다. | |
 |
Scorpion Hatchling / 전갈 유충 | 3 HP |
|
|
 |
Scorpion / 전갈 | 4 HP |
|
|
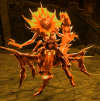 |
Scorpion Queen / 여왕 전갈 | 8 HP |
|
|
 |
Elemental (Dragon's Ghost) / 엘리멘탈 (용의 영혼) | 1 HP |
|
날아다닙니다. 드라구어, 위미르, 그리고 비팅 하트에 의해 소환될 수 있습니다. 일반 방에서도 스폰됩니다. |
 |
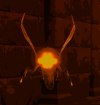
Sired Skull / 소의 두개골 | 4 HP |
|
날아다닙니다. Vétt에 의해 소환될 수 있습니다. 벽을 뚫고 다닐 수 있으며 일반 방에서도 스폰됩니다. |
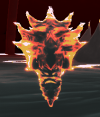 |
Dragon's Spirit / 용의 영혼 | 1 HP |
|
날아다니고 니드호그에 의해 소환됩니다. |
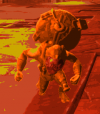 |
Flightless Imp / 날지 못하는 임프 | 6 HP |
|
데미지를 입고 플레이어에게 빠르게 달려옵니다.
|
 |
Flying Imp / 날아다니는 임프 | 2 HP |
|
|
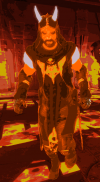 |
Mage / 마법사 | 20 HP |
|
순간이동 할 수 있으며 주기적으로 지뢰를 깝니다. 머리를 맞추면 한 방에 죽습니다.
|
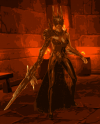 |
Ice Witch / 얼음 마녀 | 20 HP |
|
|
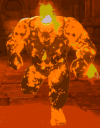 |
Igneous Red / 이그누스 레드 | 10 HP |
|
미니 보스로 나옵니다. |
 |
Kraken / 크라켄 | 50 HP |
|
미니 보스로 나옵니다. |
 |
Krakling / 크라클링 | 2 HP |
|
날아다니며 크라켄에 의해 소환될 수 있습니다. 일반 방에서도 스폰됩니다. |
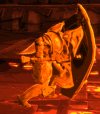 |
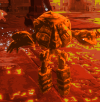
Guardian / 가디언 | 2 HP |
|
4개의 유도 미사일을 쏘고 잠시 멈춥니다. 방패 뒤에서만 데미지를 줄 수 있습니다. |
 |
Clockwork Soul / 시계공의 영혼 | 8 HP |
|
|
 |
Fire Eater / 파이어 이터 | 10 HP |
|
회염구를 날리기 전에 크게 소리를 지릅니다. |
 |
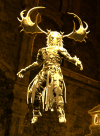
Blade / 블레이드 | 4 HP |
|
체력이 절반에 가까워지면 무적 상태가 되고 풀릴때 폭발 공격을 합니다. |
 |
Wild Witch / 야생의 마녀 | 45 HP |
|
미니 보스로 나옵니다. |
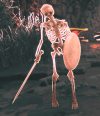 |
Synchronised Skeleton | 4 HP |
|
|
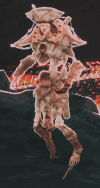 |
Skeleton Mage | 6 HP |
|
Flyer. Can spawn from slot machines. |
 |
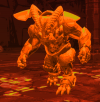
Reaper | 30 HP |
|
Can appear in challenge rooms early on. |
 |
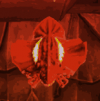
Mechanised Monstrosity | 3 HP |
|
Charges up then sends a barrage at the player. Only weakspot is the back. (name originally incorrect) |
 |
Foul Wretch | 6 HP |
|
Fires 1 bolt at range, but many arcing bolts if player is very close.
Will fall to the floor at ≤ 50% of it's health and will only attack with many arcing bolts while grounded. |
 |
Jötunn Guard | 6 HP |
|
Can be damaged briefly when lifting their shield before throwing, or with a well aimed shot at their feet as they hold their shield.
|
 |
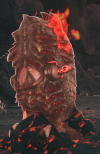
Firebreather | 12 HP |
|
Shoots two burst of three fireballs then pauses. |
 |
Beating Heart | 10 HP |
|
Spawns elementals.
|
 |
Phoenix | 8 HP |
|
Flyer. |
 |
Minotaur | 67-68 HP |
|
Appears as a miniboss |
 |
Black Knight | 96 HP |
|
Sword slashes create air blades which penetrate walls (and you) |
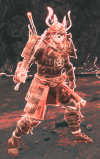 |
Servant of Darkness | 96 HP |
|
(AKA samurai) |
 |
Cutthroat | 2 HP |
|
Appears in the special room of the Castle level, and within Helheim I. |
Bosses
Every level has a boss guarding the portal to the next level. All bosses except Nidhogg can spawn with a modifier.
Draugr
Health: 60 HP Zone: Asgard 1
Four slow projectiles.
- It's pretty easy to avoid by walking perpendicular to Draugr.
Eight fast projectiles
- A projectile is fired each half-beat.
- Keep strafing in the same direction.
Floor attack. Unlike other floor attacks it is a projectile, and has a limited area of effect.
- Jump to avoid. Dashing out of the area of effect can also work. Hiding behind a pillar is another alternative, as the attack is a projectile.
Summon 3 floating heads.
- Telegraphed by laying down his weapon.
- A head is summoned each beat.
- Dispatch the adds as soon as possible to be able to focus on the boss.
Four area attacks.
- The first attack will be marked. The next 3 attacks will be performed every other beat and will not be marked.
- Attacks alternate directions and are always in the same order. Strafe left, right, left, right to avoid the whole combo.
- Strafing in the correct direction will dodge the attack, dashing is not required.
Charges and knocks the player back.
- This attack doesn't deal damage but it can knock you into a floating head.
- Be specially careful if the boss has the burning modifier as this will hurt you.
Ymir
Health: 70 HP ±2 Zone: Asgard 2
Fires a homing projectile.
- Dodge or strafe sideways to avoid.
Channels a homing high damaging beam.
- Hide behind a pillar to avoid.
- Deals increased damage the longer you touch the beam.
Summon 5 floating heads.
- Telegraphed by kneeling.
- A head is summoned each beat. Heads only start moving 1 beat after spawning.
- Dispatch the adds as soon as possible to be able to focus on the boss.
- The heads spawn counterclockwise at each beat, making it easy to destroy them istantly if you rotate accordingly around the boss.
- Some heads may not spawn if their spawn location is occupied by terrain (happens frequently when the boss uses this attack near walls or pillars).
Vétt
Health: 73 HP ±2 Zone: Vanaheim 1
Reaches for his back and then flings a spinning axe.
- Dodge or strafe sideways.
Quickly throws a spinning axe and then fires a 8 projectile barrage in the cardinal directions around him.
- Dodge, strafe sideways, (or double-jump for non-giant variants).
Transforms into a flaming ball of fire and charges the player.
- Dodge or strafe sideways.
Stops moving, readies his clubs, and then claps them together spawning a damaging orb. It moves linearly while slightly expanding before eventually phasing through the arena
- Dodge, or strafe sideways
Stops moving, and readies his clubs which glow before attacking with a flurry of axes. These travel in a quick spread in the direction he is facing
- Dodge, or strafe sideways
Stops moving and then slams the ground, causing a damaging ripple that increases in size every full-beat once spawned (eventually dissipates)
- Jump over or move away from the ripple until it dissipates
Stops moving to prepare a circle (safe-zone) and then attacks twice.
- Stand inside the circle in front of Vétt to avoid taking damage.
Gullveig
Health: 63 HP ±2 Zone: Vanaheim 2
Individually fires 5 daggers towards the player on every full-beat.
- Dodge, strafe sideways, or jump
Fires 4 daggers towards the player at once that travel in a spread.
- Dodge, strafe sideways, or jump
Attacks the ground causing it to damage the player.
- Jump when the button prompt reaches the center of the screen (crosshair)
Kneels and initiates an aerial attack.
- Stay on the ground or fly above with Odr /
 Angelic Boots /
  Spacewalker
Places a dagger in front of her which spawns a cross that can move clockwise or counter-clockwise around the arena 4 times before dissipating.
- Recognize which direction the cross starts to slowly rotate towards and react accordingly.
- The player can choose to either move in the same direction of the cross or double-jump over it to avoid the attack, this however leaves the player vulnerable to Gullveig's aerial attack.
Alvis
Health: 80 HP. Zone: Svartalfheim 1
Rapidly throws a small rock towards the player.
- Dodge, or strafe sideways
Grabs a huge rock from the ground and throws it towards the player.
- If the player is close to the point of impact, he will be pushed away from it.
- Dodge, or strafe sideways.
Crouches, then fires 8 fireballs round him.
- Dodge, strafe sideways, (or double jump for non-giant variants).
Smashes his fists onto the ground, creating 2 homing shockwaves.
- The shockwaves can't be destroyed, but only last a limited time.
Growls, creating an expanding damaging sphere.
- Before growling he stands on his feet with his hands on his head.
- The sphere only damages the player when expanding, and becomes safe every time it stops.
- Pass through the sphere when it stops; every time it stops it becomes dark red and an audio clue is played.
- Entering the sphere too early isn't advised, as you'll have limited space to dodge other attacks.
Jumps in the air smashing his fists onto the ground, creating a big explosion.
- Keeps moving forwards even after jumping, creating an explosion around the impact.
- This attack is really slow and only impacts 3 beats after starting. Be sure to keep your distance.
Stands back and inhales, then spits a barrage of fireballs in a cone in front of him.
- Doesn't track the player, but only aims where the player was once the attack was charged.
- Strafe around the boss, or dodge sideways if you are too far.
Mistcalf
Health: 130 HP. Zone: Svartalfheim 2
Throws a single projectile towards the player.
- Dodge, jump, or strafe sideways
Launches three large, semicircle slashes at the player one at a time on each beat, at varying angles.
- The first and third slash are aimed at the right of the player while the second targets the player directly.
- This attack can be avoided by strafing left and jumping over the second slash.
Thrusts his whips into the ground, one on each beat, and performs a ground attack.
- Jump when the dodge prompt reaches the crosshair to avoid taking damage.
Hits the ground that creates a straight line that lingers on the ground for a short time.
- Avoid the line, as touching it will do damage.
Mistcalf pulls the player toward itself. Does no damage.
- Be careful not to be pulled into the damaging line.
Charges up for three half beats and releases a flurry of projectiles towards the player.
- Try to get move away from the direction Mistcalf is facing to be out of the line of fire.
Transforms into a flaming ball of fire and then dashes at the player
- Three jump prompts (untied to the beat) and a dodge prompt (tied to the beat) are displayed to the player as Mistcalf initiates his charge.
- If the player jumps and dodges when these prompts reach the crosshair Mistcalf will stop his charge, otherwise he will continue to charge for a short time.
Surt
Health: 150 HP Zone: Helheim 1
First Phase:
Hits clubs together, creating an expanding hemisphere that will damage the player if touched.
- Strafe around to the open side of the hemisphere.
Hits the ground, creating a damaging line across the ground.
- Jump over the line if you must cross it.
Charges the player with a fiery outline and swings clubs at the end of charge, then swings again one beat after.
- Strafe/Dodge to the side to avoid the charge.
Second Phase:
Once taken down to 50% HP, Surt with grow and lose the clubs. After this point Surt will throw quick projectiles at the player on every beat.
- Strafe and dodge to avoid the projectiles.
Hits hands together to create an expanding hemisphere.
- Get to the open side of the hemisphere to avoid damage.
Spawns a fireball projectile from their mouth
- The fireball slowly tracks the player around the arena and can be avoided by strafing / dodging
Nidhogg
Health: 200 HP. Zone: Helheim 2
The final boss Nidhogg will only aggro the player after three rounds of fights which can be triggered via the lever on the ground, similar to a challenge room.
- First round: Draugr + 2x Flying Imp
- Second round: Ymir + 2x Ice Witch
- Third round: Jötunn Guard + 2x Firebreather
- Final round: Nidhogg
First Phase:
Launches a fast fireball at the player with a crosshair dodge warning.
- Dodge to avoid damage. Strafing will not work no matter the distance.
Creates and expanding sphere that grows in size every other beat.
- Move through the sphere when stationary.
Launches 6 projectiles on half beats at player
- Strafe/Dodge/Jump out of the way
Second Phase: Nidhogg lands on the ground and faces the player
Spawns four Dragon's Spirit in quick succession.
- Quickly dispatch them to focus on Nidhogg.
Nidhogg's Tail pokes forward and creates an expanding hemisphere
- Move around to the open side to avoid damage.
Launches six sets of three projectiles on half beats at the player.
- Strafe/Jump out of the way.
Launches a fireball at the player with a crosshair dodge warning.
- Dodge to avoid damage. Strafing will not work no matter the distance.
