Difference between revisions of "Altars"
(Clarified Trial: Want and results from angel and devil altars) |
|||
| (43 intermediate revisions by 18 users not shown) | |||
| Line 1: | Line 1: | ||
| − | + | '''Altars''' are points of interest that can appear within [[rooms]], most of them granting the player some kind of boon when interacted with. The two main kinds are chests and shrines. | |
| − | |||
| − | |||
| − | |||
| − | |||
| − | |||
| − | |||
| + | == Spawn rules == | ||
| + | Altars appear in most normal [[rooms]], excluding the spawn room on each level. One variant of {{RoomLink|Huginn's shop}} (in [[Asgard]] I) has a secret shrine. Most rooms spawn with a shrine of some kind, but their appearance is not guaranteed. | ||
Once exhausted (which may take multiple inputs), shrines cannot be used again, and will usually glow with a pale fire or a halo to indicate they've been used. | Once exhausted (which may take multiple inputs), shrines cannot be used again, and will usually glow with a pale fire or a halo to indicate they've been used. | ||
| − | |||
Only one shrine of each type will spawn in a given room, but rooms can spawn with multiple types of shrines. | Only one shrine of each type will spawn in a given room, but rooms can spawn with multiple types of shrines. | ||
| + | Shrines, especially secondary rarer shrines, can be located in hard to access places, usually high up on balconies or ledges. While some of these shrines can be reached via creatively jumping from rails, banisters, mushrooms, etc. having a mobility buff like flying, triple jump, super jump, rocket jump, grenade jump, the Space modifier or super speed can help. Some shrines may be impossible to reach with the player's current equipment and stats. | ||
| + | Shrines typically behave the same way given their type, but the player's [[Luck]] stat can induce other, better outcomes, even from basic shrines. | ||
| − | + | == Summary == | |
| − | |||
| − | |||
| − | |||
| − | == | ||
| − | |||
| − | |||
| − | === | + | === Angel and devil altars === |
| − | + | <gallery heights="200px" style="float:right;clear:right"> | |
| − | <gallery heights="200px" | + | AngelShrine.png|Angel Altar |
| − | + | DevilShrine.png|Devil Altar | |
| − | |||
| − | |||
| − | |||
| − | |||
| − | |||
</gallery> | </gallery> | ||
| − | + | These altars take the form of large statues with urns, and will accept a random number between 1 and 6 of coins (for the Angel) or keys (for the Devil) in exchange for a random result. The random results include: | |
| − | |||
| − | These | ||
* a stat increment consumable, eg. {{ItemLink|Luck Up}} | * a stat increment consumable, eg. {{ItemLink|Luck Up}} | ||
| − | * a {{ItemLink|Key}} (Angel | + | * a {{ItemLink|Key}} (Angel Altar only) or {{ItemLink|Skeleton Key}} (Devil Altar only){{verification needed}} |
* a random equippable [[item]] | * a random equippable [[item]] | ||
* an [[ultimate ability]] book | * an [[ultimate ability]] book | ||
* a [[secondary ability]] scroll | * a [[secondary ability]] scroll | ||
| − | + | ||
| − | + | Angel and devil altars cannot produce every possible item, book or scroll in the game, but rather each can only produce results from a limited loot table. Devil altars tend to produce higher quality rewards, with the notable exception being {{ItemLink|Seiðr's Blessing}}, which in turn spawns only from ''angel'' altars. | |
| + | |||
| + | === Blessing altars === | ||
| + | These are the most common altars, and take the form of statues with small offering bowls. They are easily accessible and usually appear along the peripheral walls of the room. They will accept a single {{coins|coin}} in exchange for a +1 boost to the character's stat, dependent on the statue. Often times blessing altars can be difficult to spot; they tend to blend into their surroundings, both in color and in geometry. Scanning the peripheral walls of the room is a good start. | ||
<gallery heights="200px" mode=packed> | <gallery heights="200px" mode=packed> | ||
| − | + | SpeedShrine.png|Speed Altar | |
| − | + | RangeShrine.png|Range Altar | |
| + | LuckShrine.png|Luck Altar | ||
| + | DamageShrine.png|Damage Altar | ||
| + | PrecisionShrine.png|Precision Altar | ||
| + | AbilityShrine.png|Ability Altar | ||
</gallery> | </gallery> | ||
| − | [[ | + | === Cursed chests === |
| + | See [[Chests]]. | ||
| − | === | + | === Damocles' sword === |
| − | + | [[File:DamoclesSword.png|thumb|upright=0.25|Damocles' Sword]] | |
| + | This shrine resembles a small pillar with a fiery sword above and one of 3 possible items (listed below). Activating it deals 25 damage (12.5 on Practice, and 50 on Hellish) to the player, in exchange for whatever is resting on the pillar. The damage can be reduced or avoided with abilities and items like {{AbilityLink|Block}} and {{AbilityLink|Valkyrie's Veil}}, which will negate the damage completely, or {{AbilityLink|Skjaldmeyjar's Plate}} which will reduce the damage. Possible items are: | ||
| + | * a {{ItemLink|Coin Bag}} (most common), | ||
| + | * a {{ItemLink|Key}}, | ||
| + | * a {{ItemLink|Heart Container}} (rare). | ||
| − | [[ | + | The [[Rooms#Black_Market|Black Market]] always contains three Damocles' sword shrines: single, double and triple sword shrine each dealing 25, 50 and 75 damage to the player respectively (halved on Practice, doubled on Hellish). Possible items are: |
| − | === | + | * a random equippable [[item]] |
| − | These take the form of small, square chests | + | * a stat up. |
| + | {{clr}} | ||
| + | |||
| + | === Slot machine === | ||
| + | [[File:SlotMachine.png|thumb|Slot Machine]] | ||
| + | These take the form of small, square chests with a slot in the front into which a coin is inserted. Upon inserting a coin a random outcome will occur: | ||
* Nothing. Represented by a puff of smoke. | * Nothing. Represented by a puff of smoke. | ||
* An enemy spawns. Can be one of: | * An enemy spawns. Can be one of: | ||
| Line 67: | Line 68: | ||
In addition to a previous effect, the machine can jam. The coin will remain in the slot and no further input will be accepted. | In addition to a previous effect, the machine can jam. The coin will remain in the slot and no further input will be accepted. | ||
| − | + | Slot machines can be found as a bonus altar in a normal room{{verification needed}}, or in their own special room marked on the map. | |
| − | |||
| − | |||
| − | + | {{ItemLink|Luck}} increases the chances of the slot machine not jamming and decreases the chance of getting nothing, but doesn't affect the chance to drop a {{ItemLink|Coin Bag}} or {{Coins|1}}. | |
| − | |||
=== The Dish === | === The Dish === | ||
| − | Located in [[ | + | Located in the right room of [[Helheim]] II. After depositing {{Coins|100}}, {{ItemLink|Giant Slayer Boots}} will appear. All subsequent runs will spawn the boots. |
| + | |||
| + | === Tribute altar === | ||
| + | Located in the special Tribute room, marked on the map, that can only be found in [[zones|Asgard Crypts]]. Can accept up to 50 coins one at a time. Each time it accepts a coin, it tries to increase a random stat by 1. If the stat it tries to increase is already maxed, it will increase the clip size by 1 instead. | ||
| + | |||
| + | === Prestige altar === | ||
| + | Located in the special Prestige room, marked on the map, that can only be found in [[Vanaheim]] I. Will accept 30 coins (paid at once), after which it will turn all player's currently equipped items into enchantments (they will provide their full effect but without taking a slot). Price is unaffected by number or currently equipped items and cannot be discounted with {{AbilityLink|Barter}}. Items with activations will not work anymore. | ||
| + | |||
| + | === Trial altars === | ||
| + | There are 10 Trial Altars that can make the game harder. If playing a character you already completed the game with, four of them (chosen randomly) spawn in the start room in Asgard I and can optionally be activated by the player. | ||
| + | |||
| + | {| class="wikitable sortable" | ||
| + | |- | ||
| + | ! Altar !! Description !! Effects | ||
| + | |||
| + | |- | ||
| + | | {{RichAnchor|Trial: Bleeding}} || Dying over time || | ||
| + | * You lose 0.5 health every 2 beats (visible as 1 health every 4 beats). | ||
| + | * The Glass modifier, Hellish difficulty, and Trial: Fragile each double the bleeding, causing you to lose 1/2/4 health every 2 beats. | ||
| + | * There is no effect on [[Odr]] and [[Sanngriðr]] as long as the bleeding damage is below 1. | ||
| + | |||
| + | |- | ||
| + | | {{RichAnchor|Trial: Fabled}} || All enemies are tougher || | ||
| + | * All enemies, including bosses, have their health doubled. | ||
| + | * Gives a bonus to score when shooting enemies and entering rooms. | ||
| + | |||
| + | |- | ||
| + | | {{RichAnchor|Trial: Fragile}} || You take double damage || | ||
| + | * Damage from all sources is doubled. | ||
| + | * Stacks with the double damage effect of Hellish difficulty and the Glass modifier. | ||
| + | |||
| + | |- | ||
| + | | {{RichAnchor|Trial: Gambit}} || Get 10 coins, but lose all coins when hit || | ||
| + | * 10 more coins are also rewarded each time a new floor has been reached. | ||
| + | * Negating an attack with {{AbilityLink|Block}} or {{AbilityLink|Valkyrie's Veil}} will still trigger a loss of all coins. | ||
| + | * Instant death on hit with [[Herfjötur]]. | ||
| + | * If paired with Trial: Bleeding, every 2 beats all coins are lost since the bleeding effect counts as a hit. This effect still occurs with [[Odr]] and [[Sanngriðr]]. | ||
| + | |||
| + | |- | ||
| + | | {{RichAnchor|Trial: Godlike}} || Tougher bosses || | ||
| + | * Boss health is doubled (applied after boss modifiers). If paired with Trial: Fabled, bosses will have 4x health. | ||
| + | * Score gained on all bosses is halved. | ||
| + | |||
| + | |- | ||
| + | | {{RichAnchor|Trial: Mania!}} || Double the damage, double the enemies || | ||
| + | * The player deals double damage but twice as many enemies as normal will spawn. This includes minibosses and bosses. | ||
| + | * Bosses spawned can have different modifiers from each other. If one or both bosses spawns with the Cloned modifier, 3 or 4 of the boss will spawn. | ||
| + | * [[Gullveig]] and [[Nidhogg]] will ''not'' be doubled. | ||
| + | * Challenge rooms, and the special waves of enemies in [[Helheim]] II, are unaffected. | ||
| + | * Gives a bonus to score when shooting enemies. | ||
| + | |||
| + | |- | ||
| + | | {{RichAnchor|Trial: Poverty}} || No shops after Asgard || | ||
| + | * Huginn's shop only appears in [[Asgard]] and [[Helheim]] II. | ||
| + | |||
| + | |- | ||
| + | | {{RichAnchor|Trial: Runner}} || Die at 20 mins || | ||
| + | * Gives a bonus to score when shooting enemies. | ||
| + | |||
| + | |- | ||
| + | | {{RichAnchor|Trial: Twitch}} || Enemy projectiles are faster || | ||
| + | * Gives a bonus to score when shooting enemies and entering rooms. | ||
| + | |||
| + | |- | ||
| + | | {{RichAnchor|Trial: Want}} || Half ammo || | ||
| + | * Base ammo for each weapon is halved, rounding down. | ||
| + | * {{ItemLink|Clip Up}} still increases the clip size by 1, as usual. | ||
| + | * Upon entering a new floor, your ammo is still set to the ''unmodified'' clip size, meaning you start each floor with over 100% ammo. Subsequent reloads, however, still restore ammo only up to the new (halved) clip size. | ||
| + | * Will remove {{ItemLink|The Best Defense}} from the item pool, and the player character if already held. | ||
| + | |||
| + | |} | ||
Latest revision as of 13:35, 10 January 2022
Altars are points of interest that can appear within rooms, most of them granting the player some kind of boon when interacted with. The two main kinds are chests and shrines.
Contents
Spawn rules[edit]
Altars appear in most normal rooms, excluding the spawn room on each level. One variant of ![]() Huginn's shop (in Asgard I) has a secret shrine. Most rooms spawn with a shrine of some kind, but their appearance is not guaranteed.
Once exhausted (which may take multiple inputs), shrines cannot be used again, and will usually glow with a pale fire or a halo to indicate they've been used.
Only one shrine of each type will spawn in a given room, but rooms can spawn with multiple types of shrines.
Shrines, especially secondary rarer shrines, can be located in hard to access places, usually high up on balconies or ledges. While some of these shrines can be reached via creatively jumping from rails, banisters, mushrooms, etc. having a mobility buff like flying, triple jump, super jump, rocket jump, grenade jump, the Space modifier or super speed can help. Some shrines may be impossible to reach with the player's current equipment and stats.
Shrines typically behave the same way given their type, but the player's Luck stat can induce other, better outcomes, even from basic shrines.
Huginn's shop (in Asgard I) has a secret shrine. Most rooms spawn with a shrine of some kind, but their appearance is not guaranteed.
Once exhausted (which may take multiple inputs), shrines cannot be used again, and will usually glow with a pale fire or a halo to indicate they've been used.
Only one shrine of each type will spawn in a given room, but rooms can spawn with multiple types of shrines.
Shrines, especially secondary rarer shrines, can be located in hard to access places, usually high up on balconies or ledges. While some of these shrines can be reached via creatively jumping from rails, banisters, mushrooms, etc. having a mobility buff like flying, triple jump, super jump, rocket jump, grenade jump, the Space modifier or super speed can help. Some shrines may be impossible to reach with the player's current equipment and stats.
Shrines typically behave the same way given their type, but the player's Luck stat can induce other, better outcomes, even from basic shrines.
Summary[edit]
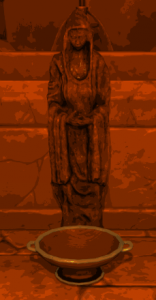
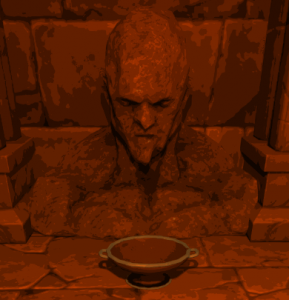
Angel and devil altars[edit]
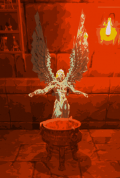
Angel Altar
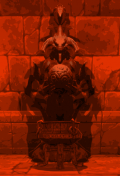
Devil Altar


These altars take the form of large statues with urns, and will accept a random number between 1 and 6 of coins (for the Angel) or keys (for the Devil) in exchange for a random result. The random results include:
- a stat increment consumable, eg.
 Luck Up
 - a
 Key (Angel Altar only) or
  Skeleton Key (Devil Altar only)[verification needed • edit • ?]
 - a random equippable item
- an ultimate ability book
- a secondary ability scroll
Angel and devil altars cannot produce every possible item, book or scroll in the game, but rather each can only produce results from a limited loot table. Devil altars tend to produce higher quality rewards, with the notable exception being ![]() Seiðr's Blessing, which in turn spawns only from angel altars.
Seiðr's Blessing, which in turn spawns only from angel altars.
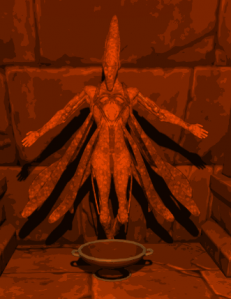
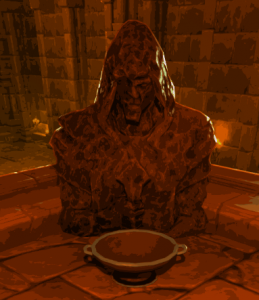
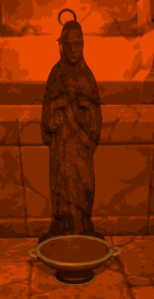
Blessing altars[edit]
These are the most common altars, and take the form of statues with small offering bowls. They are easily accessible and usually appear along the peripheral walls of the room. They will accept a single coin![]() in exchange for a +1 boost to the character's stat, dependent on the statue. Often times blessing altars can be difficult to spot; they tend to blend into their surroundings, both in color and in geometry. Scanning the peripheral walls of the room is a good start.
in exchange for a +1 boost to the character's stat, dependent on the statue. Often times blessing altars can be difficult to spot; they tend to blend into their surroundings, both in color and in geometry. Scanning the peripheral walls of the room is a good start.
Speed Altar
Range Altar
Luck Altar
Damage Altar
Precision Altar
Ability Altar


Cursed chests[edit]
See Chests.
Damocles' sword[edit]

This shrine resembles a small pillar with a fiery sword above and one of 3 possible items (listed below). Activating it deals 25 damage (12.5 on Practice, and 50 on Hellish) to the player, in exchange for whatever is resting on the pillar. The damage can be reduced or avoided with abilities and items like ![]() Block and
Block and ![]() Valkyrie's Veil, which will negate the damage completely, or
Valkyrie's Veil, which will negate the damage completely, or ![]() Skjaldmeyjar's Plate which will reduce the damage. Possible items are:
Skjaldmeyjar's Plate which will reduce the damage. Possible items are:
- a
 Coin Bag (most common),
 - a Key,
- a
 Heart Container (rare).
The Black Market always contains three Damocles' sword shrines: single, double and triple sword shrine each dealing 25, 50 and 75 damage to the player respectively (halved on Practice, doubled on Hellish). Possible items are:
- a random equippable item
- a stat up.
Slot machine[edit]

These take the form of small, square chests with a slot in the front into which a coin is inserted. Upon inserting a coin a random outcome will occur:
- Nothing. Represented by a puff of smoke.
- An enemy spawns. Can be one of:
- A consumable spawns. Can be one of:
In addition to a previous effect, the machine can jam. The coin will remain in the slot and no further input will be accepted.
Slot machines can be found as a bonus altar in a normal room[verification needed • edit • ?], or in their own special room marked on the map.
![]() Luck increases the chances of the slot machine not jamming and decreases the chance of getting nothing, but doesn't affect the chance to drop a
Luck increases the chances of the slot machine not jamming and decreases the chance of getting nothing, but doesn't affect the chance to drop a ![]() Coin Bag or 1
Coin Bag or 1![]() .
.
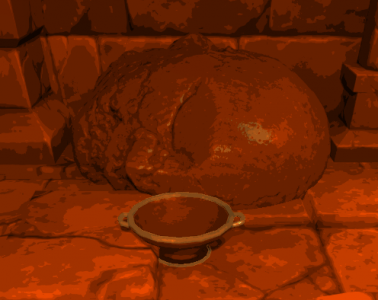
The Dish[edit]
Located in the right room of Helheim II. After depositing 100![]() ,
, ![]() Giant Slayer Boots will appear. All subsequent runs will spawn the boots.
Giant Slayer Boots will appear. All subsequent runs will spawn the boots.
Tribute altar[edit]
Located in the special Tribute room, marked on the map, that can only be found in Asgard Crypts. Can accept up to 50 coins one at a time. Each time it accepts a coin, it tries to increase a random stat by 1. If the stat it tries to increase is already maxed, it will increase the clip size by 1 instead.
Prestige altar[edit]
Located in the special Prestige room, marked on the map, that can only be found in Vanaheim I. Will accept 30 coins (paid at once), after which it will turn all player's currently equipped items into enchantments (they will provide their full effect but without taking a slot). Price is unaffected by number or currently equipped items and cannot be discounted with ![]() Barter. Items with activations will not work anymore.
Barter. Items with activations will not work anymore.
Trial altars[edit]
There are 10 Trial Altars that can make the game harder. If playing a character you already completed the game with, four of them (chosen randomly) spawn in the start room in Asgard I and can optionally be activated by the player.
| Altar | Description | Effects |
|---|---|---|
Trial: Bleeding  |
Dying over time | |
Trial: Fabled  |
All enemies are tougher |
|
Trial: Fragile  |
You take double damage |
|
Trial: Gambit  |
Get 10 coins, but lose all coins when hit |
|
Trial: Godlike  |
Tougher bosses |
|
Trial: Mania!  |
Double the damage, double the enemies |
|
Trial: Poverty  |
No shops after Asgard | |
Trial: Runner  |
Die at 20 mins |
|
Trial: Twitch  |
Enemy projectiles are faster |
|
Trial: Want  |
Half ammo |
|